Beat the Dust: How to Clean Your Computer to Prevent Overheating and Performance Loss
We’re all about clean spaces—but cleanliness doesn’t stop at floors, windows, or countertops. One of the dirtiest, most neglected items in your home? Your computer. Whether you’re working, studying, or streaming, your device is quietly collecting dust—and that buildup can do real damage.
Too often, we see people ignore the early signs: fans running louder than usual, the laptop getting hot, or apps taking forever to load. Most don’t realize that a little cleaning could prevent all that—and even extend the life of their machines.
In this guide, we’ll show you exactly how to clean your computer the right way. Step by step, we’ll walk you through tools, techniques, and safety tips to help you prevent overheating, improve performance, and avoid expensive repairs. You don’t need to be tech-savvy—just ready to wipe, dust, and refresh.
Dust vs. Devices: Why Computer Hygiene Matters
We clean homes every day, but one thing we’ve noticed—even in the tidiest apartments—is how easy it is to overlook what’s right on the desk. Your computer is a dust magnet. And while it might not look dirty at first glance, the buildup inside can seriously hurt performance and longevity.
Dust blocks airflow through vents and fans, forcing your computer to run hotter. When internal temperatures spike, the system tries to compensate: fans work overtime, processors throttle down to avoid damage, and in some cases, devices shut down entirely. Over time, this stress wears down critical components, shortens your hardware’s life, and could lead to costly repairs—or total failure.

Cleaning your computer isn’t just about appearances. It’s about performance, safety, and protecting an investment you probably rely on daily. Even though MyClean doesn’t clean electronics, we care deeply about hygiene in every corner of your space. That includes sharing best practices that help you keep your tech as spotless as your countertops.
Early Warning Signs You Can’t Ignore
Before your computer breaks down, it usually speaks up—just not in words. Dust accumulation inside your machine disrupts airflow, traps heat, and strains the cooling system. As the temperature rises, your device sends distress signals. We’ve learned to spot these signs quickly, and you should too:
- Loud, Constant Fan Noise: If your fan sounds like it’s working overtime even when you’re just browsing the web, it’s likely compensating for clogged vents or a dust-covered heatsink.
- Sudden Slowdowns: A once-speedy machine that now hesitates to open apps or load pages might be throttling its performance to avoid overheating.
- Hot to the Touch: If your laptop feels uncomfortably warm, especially around the keyboard or base, that heat has nowhere to go—and it’s a sign your internal fans aren’t keeping up.
- Random Shutdowns or Freezing: These are red flags. Many systems shut themselves down automatically to prevent permanent damage from high temperatures.
Catching these symptoms early gives you the chance to clean and cool your machine before the damage becomes irreversible.

Just like we prevent grime from turning into mold in kitchens, we believe in addressing tech buildup before it shortens your device’s lifespan.
Safety Prep Checklist
Before diving into dust removal, a quick prep can make all the difference—keeping both you and your computer safe. We always say: just like cleaning a bathroom or kitchen, the right prep protects your tools and prevents accidents. Here’s what we recommend:
- Shut Down and Unplug Everything: Never clean a powered device. Turn off your computer completely and disconnect all cables, including the charger, mouse, keyboard, and monitor.
- Remove External Accessories: Detach USB drives, dongles, and other devices. If you’re cleaning a laptop, take out the battery if it’s removable.
- Ground Yourself: Static electricity can fry delicate internal components. Before touching anything inside the case, touch a metal surface or wear an anti-static wrist strap.
- Back Up Your Data: It’s rare, but accidents happen. Save your files to an external drive or cloud service—especially before opening up a desktop or laptop for internal cleaning.
- Choose a Clean, Dry Workspace: Use a flat surface with good lighting. Avoid carpets, which can generate static. A wooden or tile floor is ideal.
- Keep Liquids Away: Even if you’re using alcohol-based wipes, be extra cautious. Never spray anything directly on the machine—always dampen the cloth first.
By taking a few extra minutes to prep, you’re ensuring a safe, smooth clean that won’t do more harm than good.
Your DIY Cleaning Kit
Just like we rely on high-quality tools for professional home cleaning, your computer deserves a proper cleaning kit too. These essentials are affordable, easy to find, and safe for delicate electronics when used correctly.
Here’s what we recommend:
- Compressed Air Canister: Perfect for blasting dust out of vents, fans, and between keyboard keys. Hold the can upright and use short bursts to avoid moisture buildup. Electric Air Duster could be a great tool regular use.
- Microfiber Cloths: Gentle on screens and cases, these cloths lift dust without scratching surfaces. Always use a dry or slightly damp cloth—never anything soaked.
- 70% Isopropyl Alcohol: Ideal for disinfecting touch surfaces like keyboards, mouse, and trackpads. Make sure it’s diluted—anything higher evaporates too fast, and lower concentrations leave residue.
- Cotton Swabs: Great for precision cleaning around vents, ports, and small crevices.
- Soft Brush: A clean, dry paintbrush or makeup brush works well to dislodge stubborn dust from fan blades and heat sinks.
- Anti-Static Wrist Strap: Optional but highly recommended when opening the case of a desktop or laptop. It grounds you to prevent static discharge that could damage components.

Having the right tools makes the job faster, safer, and more effective—just like the difference between scrubbing with a sponge versus the right tile brush. Prep your kit, and you’re halfway there.
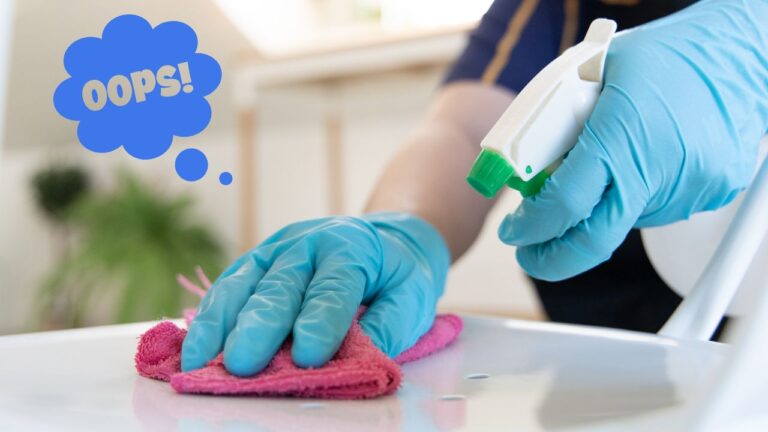
External Dust-Off Routine
The outside of your computer might seem clean, but it’s one of the most touched—and overlooked—areas when it comes to hygiene. We always say: just like wiping down a doorknob or light switch, cleaning your computer’s exterior is a small act that protects your health and your hardware.
Screen Wipe-Down
Use a dry microfiber cloth to gently remove dust. For smudges, lightly dampen the cloth with water or a 70% isopropyl alcohol solution. Wipe in slow, circular motions—never press too hard or spray anything directly on the screen.
Keyboard Scrub
Turn the laptop or keyboard upside down and shake it gently to dislodge loose debris. Then use compressed air to clean between the keys. Finish by wiping the keys with a cloth dampened with alcohol, focusing on high-touch zones like the spacebar and return key
Mouse and Trackpad Cleanse
Wipe the mouse and trackpad with a disinfectant cloth or an alcohol-dampened microfiber. Be sure to clean the underside of the mouse and the edges of the trackpad, where grime often collects.
Vent Brushing
Dust around exhaust vents using a soft brush or compressed air. These areas are crucial for airflow—blocked vents can lead to overheating fast.
Ports and Cables
Carefully blow dust out of USB, HDMI, and charging ports using compressed air. For stubborn buildup, a dry cotton swab can help—but avoid inserting anything that might damage internal contacts.
This routine takes just a few minutes but goes a long way in preventing grime from becoming a gateway for overheating and component failure.
Deep Dust Extraction Inside the Case
If you’ve never opened your desktop or laptop before, the thought can feel intimidating—but with care and the right tools, internal cleaning is completely doable. Just like deep behind a stove, it’s not something you do every day—but when you do, the results are worth it.
Step 1: Power Down, Unplug, and Ground
Double-check that the computer is off and unplugged. If it’s a desktop, flip the power switch on the back of the PSU to “off.” Touch a grounded metal surface or use an anti-static wrist strap to discharge any static electricity before handling internal components.
Step 2: Open the Case or Access Panel
Use a screwdriver if needed. Most desktops have thumbscrews or simple slide-off panels. For laptops, refer to the manual—some models allow keyboard or bottom-plate removal for access to fans and vents.
Step 3: Dust with Compressed Air
Using short, controlled bursts, blow out dust from:
- Cooling Fans – Hold the blades in place with a pencil or finger to avoid overspinning, which can damage bearings.
- Heat Sinks and Vents – These gather the most dust and affect thermal performance.
- Power Supply Unit (PSU) – If it has a vent, aim the nozzle to push dust out without opening the unit.
Always keep the can upright to avoid spraying propellant, and never use a vacuum cleaner directly—some generate static electricity that could damage components.
Step 4: Brush and Spot Clean
Use a soft brush to loosen stubborn dust clusters in corners or around cabling. A cotton swab with a small amount of alcohol can help with sticky spots.
5: Close It Up
Once you’re satisfied with the clean, reattach panels, reconnect accessories, and power the system back on.
Regular internal dust removal—ideally every 3 to 6 months—can dramatically extend your computer’s lifespan and help it run cooler, quieter, and faster. It’s the equivalent of a seasonal deep clean for your tech.
If you’re not comfortable opening up your computer, stick to the external cleaning routine and call a professional to handle the internal maintenance.
Post-Clean Performance Check
Once the cleaning’s done, it’s time to make sure everything’s running smoothly. Just like we double-check a freshly cleaned apartment for missed spots or lingering smells, a quick system check ensures your effort paid off—and that your computer is cooler, quieter, and more responsive.
Monitor Temperatures
Download a free app like HWMonitor (Windows) or Mac Fan Control (Mac) to track internal temperatures. After a deep clean, you should see a noticeable drop—especially while running multiple apps or watching videos.
Listen to the Fans
Are they quieter? More consistent? Loud or erratic fan noise usually signals dust buildup or airflow obstruction—if that’s improved, your clean made a difference.
Check for Random Freezing or Shutdowns
Give the system 30–60 minutes of regular use. If you previously had surprise shutdowns, lag, or screen flickers, a dust-free interior may have just solved the issue.
Digital hygiene goes hand-in-hand with physical cleanliness. A clutter-free hard drive and a cool, dust-free chassis? That’s the kind of harmony we aim for in every space.
When DIY Isn’t Enough—Call a Tech Pro
We love a good DIY, but sometimes, calling in a specialist is the smartest move. Just like we wouldn’t expect clients to clean mold behind drywall or degrease an industrial kitchen vent, some computer issues go beyond surface dust. Here’s when to consider professional help:
Liquid Cooling Systems
Custom desktop rigs with liquid cooling need expert hands. Draining and cleaning a loop incorrectly can lead to leaks, pump damage, or worse. If that’s your setup, schedule with a certified technician.
Laptop Disassembly Risks
Many modern laptops are sealed with adhesives or packed tight with fragile ribbon cables. For models without easy-access panels, forcing them open can void warranties or damage parts.
Persistent Overheating or Fan Errors
If your computer still runs hot after a deep clean—or shows BIOS errors related to fans—it may have a faulty sensor, dying fan, or thermal paste issue. A pro can diagnose and fix it fast.
Noisy or Clicking Sounds Inside
Grinding, clicking, or rattling from inside your machine? That’s likely a mechanical problem—not just dust. Shut it down and get it checked.
Conclusion
Regular external cleaning is often enough to keep your computer running without issues. Dusting vents, wiping screens, and disinfecting high-touch areas go a long way in preventing overheating and performance loss.
When deeper maintenance is needed—just like with your home—you have options: tackle it yourself if you’re comfortable, or bring in a specialist.
Think of it like your house cleaning routine: daily upkeep keeps things in check, but every now and then, a thorough deep clean makes all the difference. That’s where we come in. While you manage the small stuff, MyClean is here to handle the heavier lift—so your space (and your tech) stay spotless and stress-free.